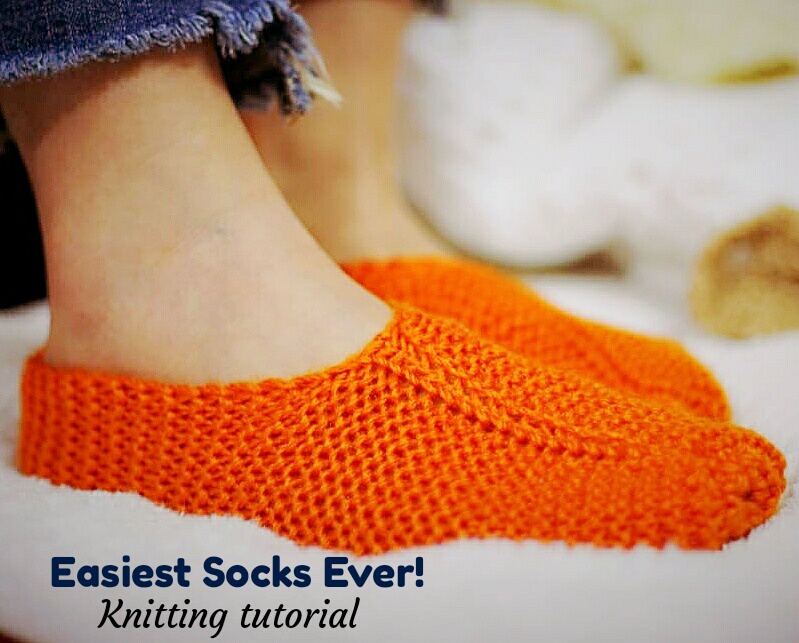
Knit The Easiest Socks Ever (Unisex)

Designed by Kinjinlu Khumba

Level: Beginners – Intermediate

#KK-Knit-Socks-001

I’m so happy to be sharing this beautiful yet very easy socks pattern with you. Well, its one of the easiest ever socks I’ve ever kniited that actually comes out elegantly. I’ve put up a YouTube video for this pattern for free, but I still get the request to put out a written pattern. So here’s a free written pattern and you’ll understand completely if you have watched the YouTube video. Also I’ve put up the INSTANT DOWNLOAD printable pattern on Etsy and Ravelry, a full picture tutorial with different size adjustments tips to alter per one’s needs.

 All the links to my shop and video will be provided at the end of the post if you need to access them.

Materials:

1)     4 mm knitting needles

2)     Worsted weight yarn (color and brand of your choice)

3)     Tapestry needle to sew

4)     Scissors

5)     Measuring tab or inches scale


  Abbreviations:

1)     K = Knit

2)     St = stitch

3)     K2tog= knit 2 together


4)     Slp = slip

Note: If you want to achieve the nice ribbing on the socks, do this. At the beginning of every row, do not knit the first st but slp it onto the new working needle as if to purl; then bring the yarn forward to (so that it doesn’t create additional stitch), and knit the rest of the stitch. This is the same for every row till your project binds off.

Pattern: (small size)

Construction:

1.      Cast on 30 sts

2.      Knit the first st as explained above (refer note)

3.      K 30 sts every row till your work measures 6” – 7” (without stretching)

4.      Stretch slightly to see if it fits the length of your foot 

  Decreasing row:

5)     K1, k2tog all across, K1

6)     Bind off. Leave a long tail to sew in later

  Sewing to form the socks:

7)     With the bind off side facing inwards, fold it, pass the needle in an
out, pull the yarn to close the toe area, secure it.

           Do not close off the gap completely if you want to get the cute little hole effect on the toe.
8)     Wip stitch it through only the front loop of both the sides

9)     Stitch it up to half of its length, fasten off. Hide the extra tails. 

10)     Stitch up the back (heel area) by a simple wip stitch. Hide all extra tail. 

11)     Turn your work inside out and viola! There you have your beautiful
socks. 

Detailed explanation with picture tutorial is available in a PDF format, with instructions on how to resize the slipper/socks  as per requirements. 

To get the printable PDF, you can get it from my Etsy store here


You can also get it from the Ravelry if you prefer that. Click below to take you to Ravelry

Or you can watch the free video tutorial on my YouTube channel. Its free full visual tutorial.

Thank you so much for your support, because of which I am able to run this website. I hope you enjoy the pattern. Let me know how your opinions and thoughts on this pattern. Tag me in other social media platform like Facebook and Instagram, and pin the project on Pinterest. I’d very much love to see your work. 

This design, the written pattern and images are a copyright of Lu’s Handicrafts and may not be copied or reproduced in any way whether on paper or electronically.  You have permission to sell the finished products made from this pattern, but please leave a link to my website, www.lushandicrafts.com, in your product listing specifying that Kinjinlu Khumba is the designer of this pattern. Tag me on Instagram @lus_handicrafts and Facebook @Lu’s Handicrafts if you make something with this pattern. Thank you for supporting me.

If you have any trouble with this pattern, find errors or want to give feedback, please feel free to contact me at lushandicrafts@gmail.com. Also a visual tutorial is available on my YouTube channel, Lu’s Handicrafts, if you need further assistance

Leave a Comment

Your email address will not be published. Required fields are marked *