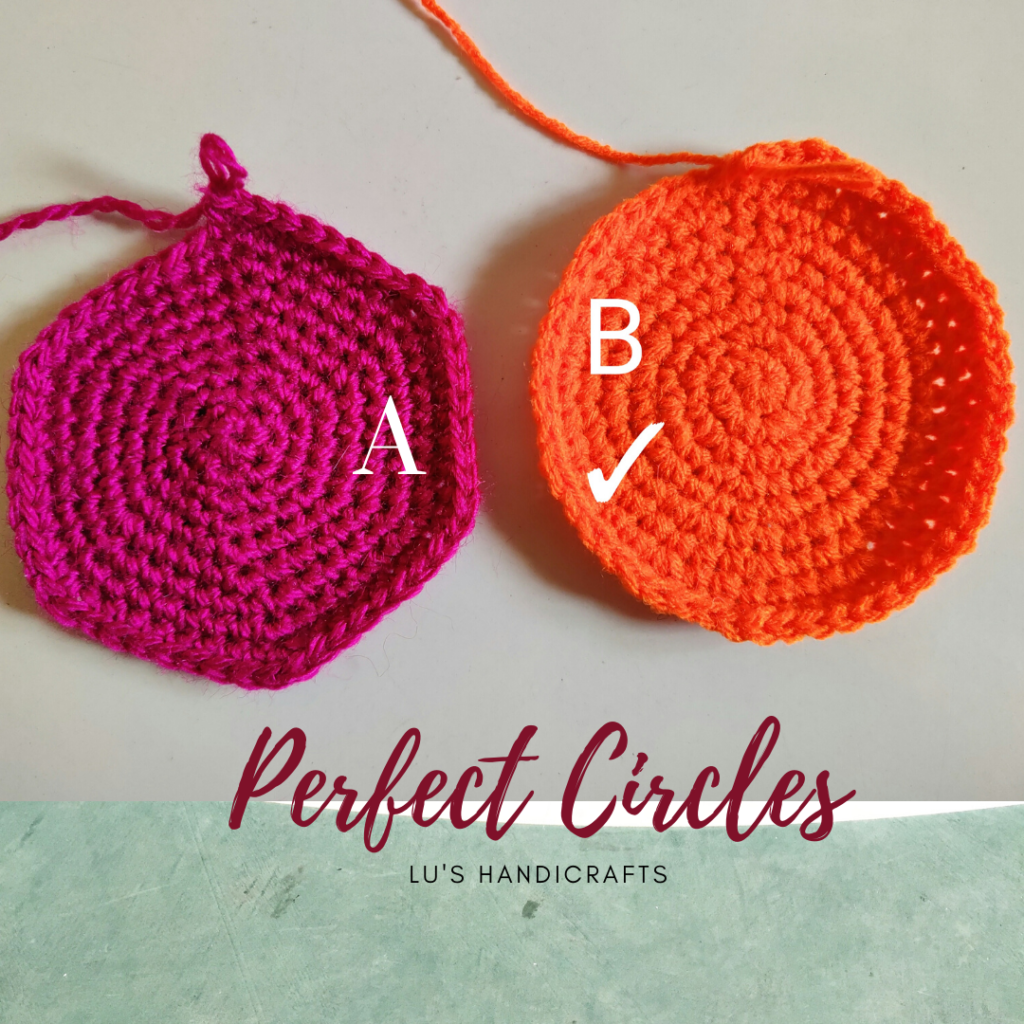
If you’ve been crocheting even for a little while, you might have come across situations like these where your crochet circle is not a perfect round, but more like a hexagon. This is because of an increase every row following a certain repetitive pattern. This pattern is the most commonly used one when crocheting this way. It is also the easiest to remember. And I’m not saying this is wrong. this is perfectly fine and used by almost everyone for their project. Besides the hexagon like shape won’t be visible if you’re making it into crochet balls or amigurumis and toys. I have also used this very pattern for my videos. But sometimes you can get into trouble when you want a perfect circle without the obvious edges, like coasters. So I’ve worked out a pattern to give a perfect circle. If you’ve already figured it out, that’s amazing. please feel free to share it with us all. If not, lets learn what I discover together. This pattern works for me so if you’re facing the same issue, I hope this helps you too.
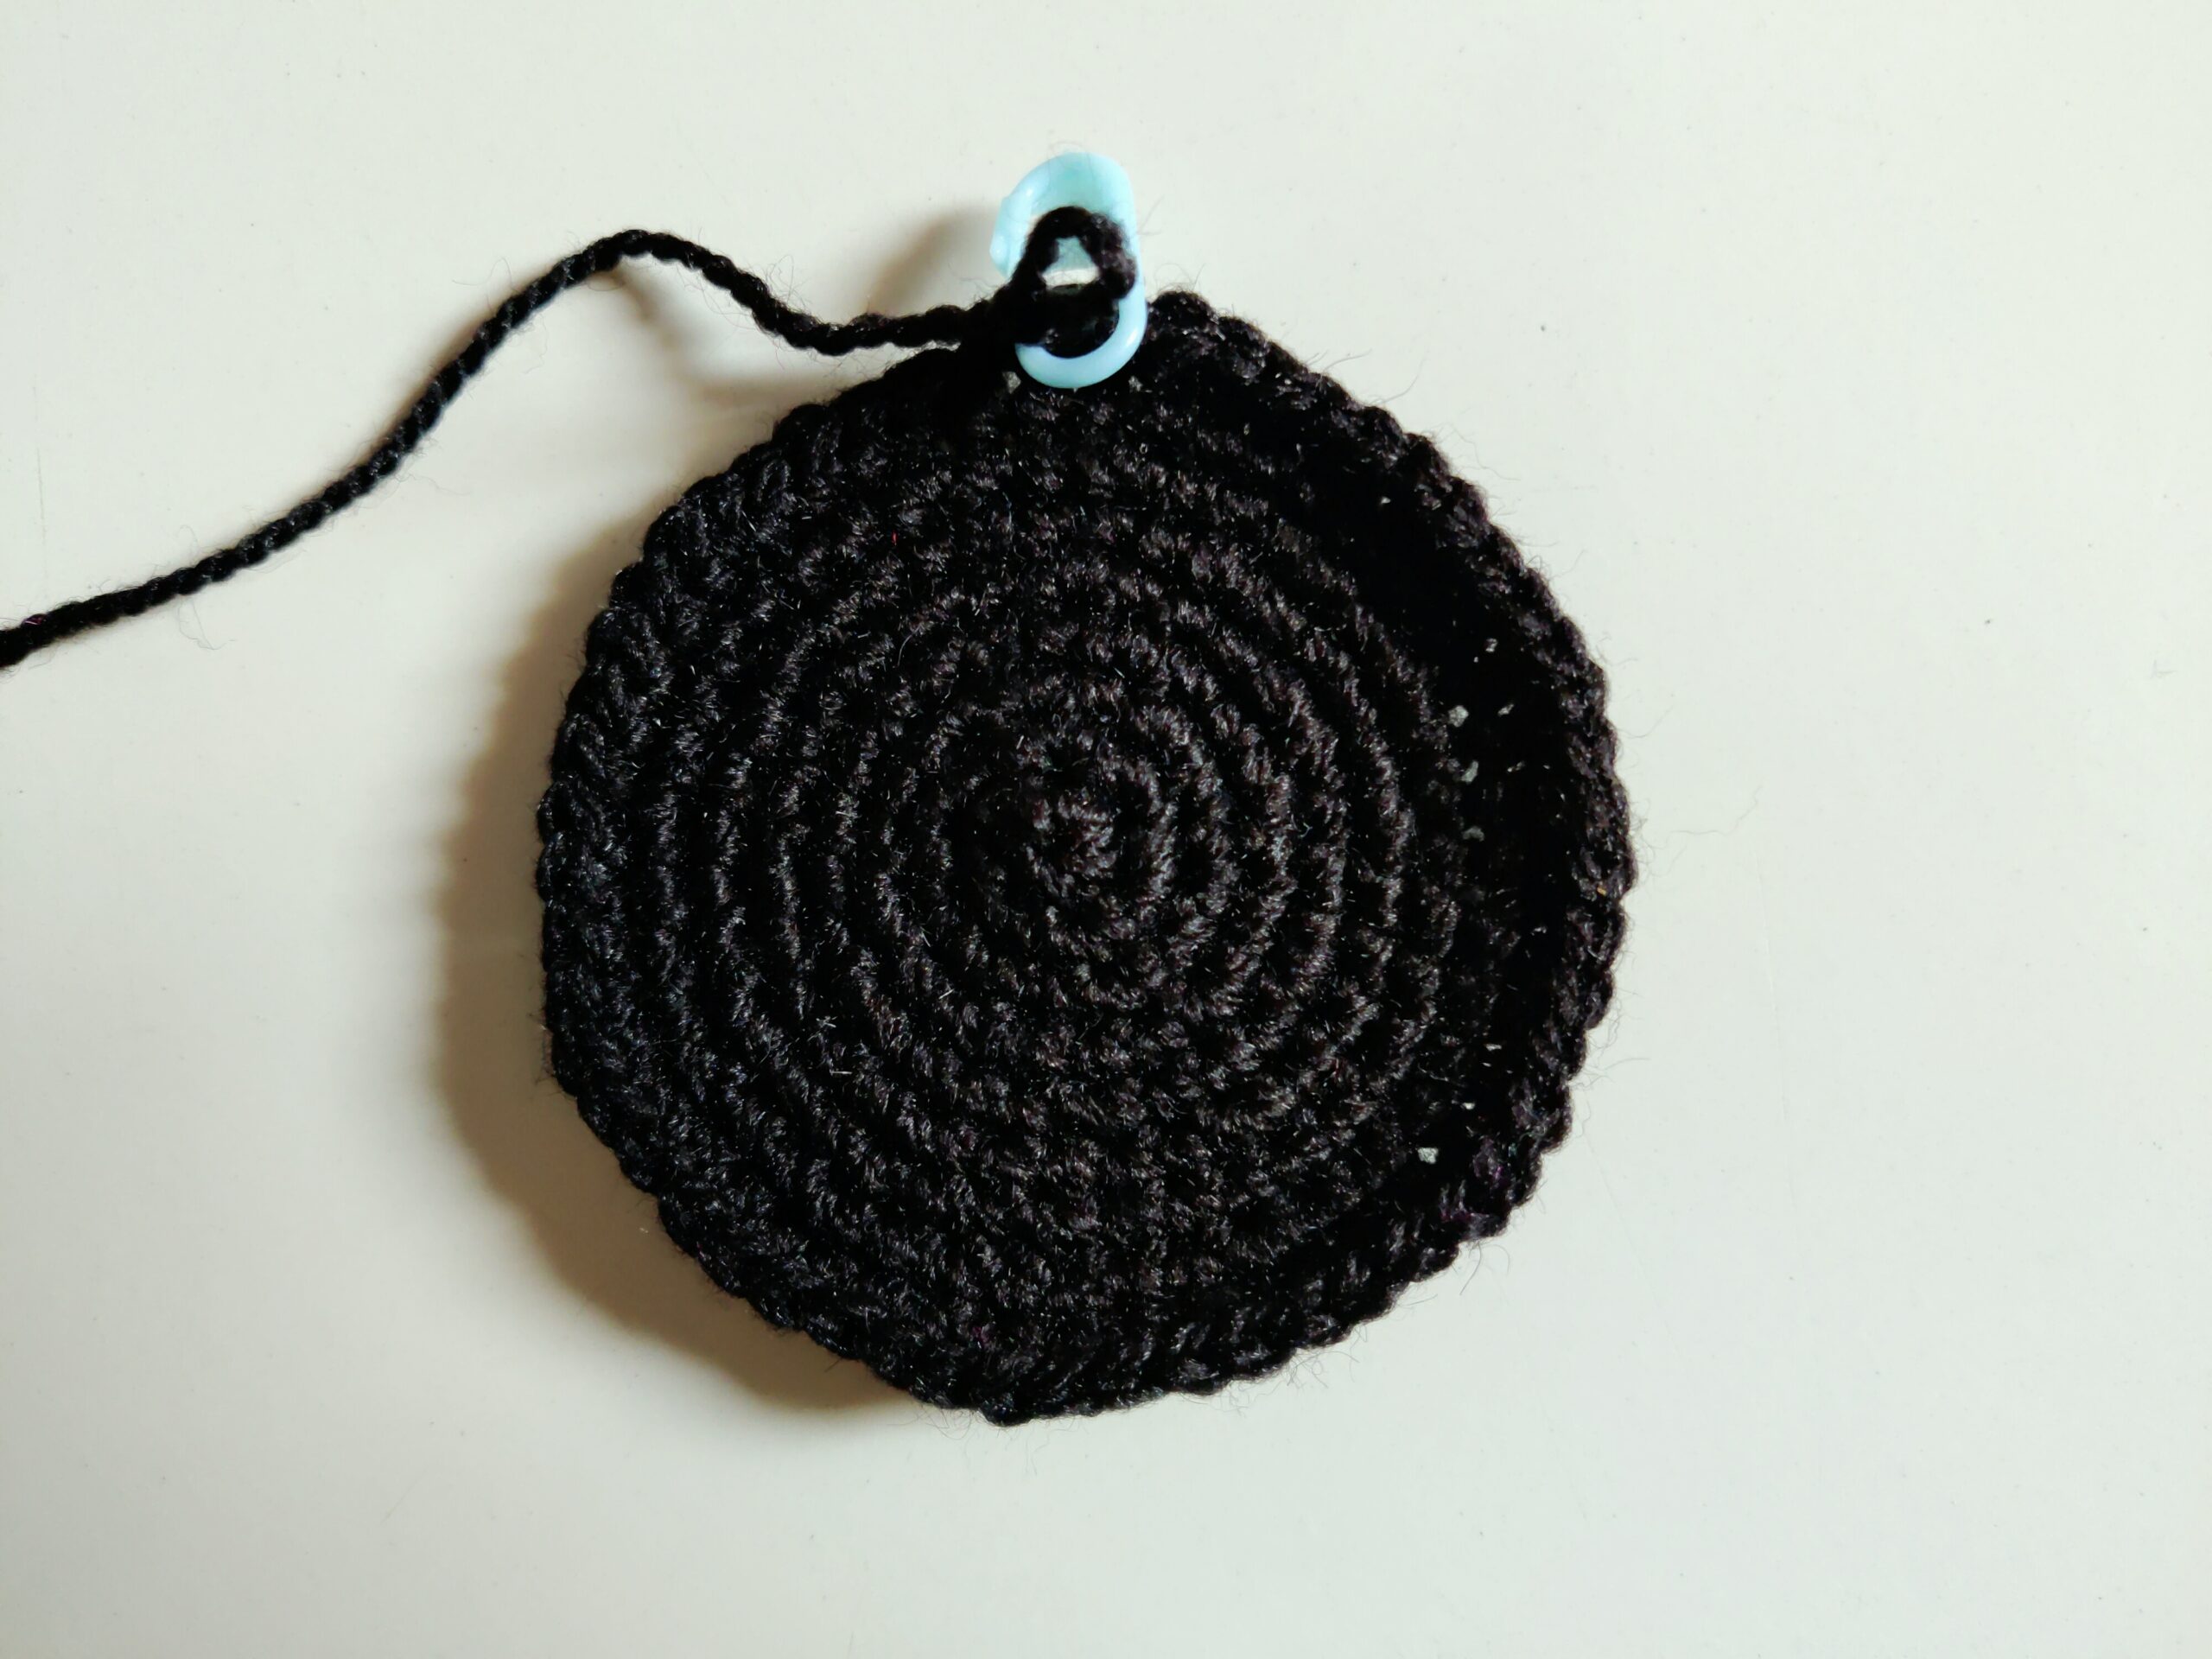
I’m going to start with a 6sc into the magic circle. The principal of increases is the same. The only difference is where the increases are placed.
Round 1: 6sc into magic ring. You can mark the 1st or last st. I’m Marking the last st. here.
Round 2: SC inc ………..In Round 2, we will increase in every stitch, so put 2sc into every st all around.
Round 3: 1sc, inc. 1sc, inc all around. You should end the round with an inc.
Round 4: Inc, 2sc…. normally we would put 2sc and then increase, but here we will shift that increase st. So start with an increase, then put 2sc, inc, 2sc all around. You should end the round with 2sc in the last 2 stitches.
Round 5: 2sc, inc, 3sc…. 1sc…. now in this row we will need to put inc after 3sc, but we will start with 2sc, then increase, then 3sc, inc, 3sc, inc all around. When You reach the st marker you should be putting 1sc.
Round 6: inc, 4sc…… to alternate the inc st, we will start with an inc, then 4sc in the next 4 sts, inc, 4sc all around. You should end the round with 4sc.
Round 7: 3sc, inc, 5sc…..2sc…Again we will begin halfway with the number of stitches thats between increases. This means, This row repeat should be 5sc into the next 5 stitches, then inc, 5sc inc. So the number of stitches between these increases is 5. Therefore instead of putting 5sc, we will go for half. Half of 5 is 2.5, but since stitches can’t be in decimals, lets make it 3 sts. We’er doing this because we want the increases to be jumbled up; So then, 3sc into the first 3 sts, inc. then 5sc into the next 5 sts, inc, 5sc, inc all around. You should end the round with 2sc in the last 2 sts. Now the last 2 stitches and the 1st 3 sts makes 5. So it all comes together. I hope this makes sense. If not, feel free to see it again. I believe it’ll be clearer.
Round 8: Inc, 6sc…. Now the next round is Inc in the beginning st, then 6sc in the next 6 sts, inc, 6sc all around. End the round with 6sc into the last 6 sts.
Round 9: 4sc, inc, 7sc…..3sc……. Now, round 9 will be 4sc, inc, 7sc, inc, 7sc, inc all around, ending the row with 3sc into the last 3sts.
The next round will be an inc in the first st and then 8sc. Continue this way for how big you want your round to be. Once you start working on it, You’ll understand better. So I hope this helps you out.
Also if you need to see a visual explanation, here’s the video.
I’ll be making few projects in the near future using this technique, and of course I’ll be sharing the process with you. So stick with me and I’ll meet you in the next post with another pattern. Meanwhile feel free to check some other popular posts and patterns you might like on this website. Thank you for reading. Bye for now. Have a wonderful week ahead.
Copyright © 2021 Lu’s Handicrafts
This design, the written pattern and images are a copyright of Lu’s Handicrafts and may not be copied or reproduced in any way whether on paper or electronically. You have permission to sell the finished products made from this pattern, but please leave a link to my website, www.lushandicrafts.com in your product listing specifying that Kinjinlu Khumba is the designer of this pattern. Thank you for supporting me.
If you have any trouble with this pattern, find errors or want to give feedback, please feel free to contact me at lushandicrafts@gmail.com. Also a visual tutorial is available on my YouTube channel, Lu’s Handicrafts, if you need further assistance.