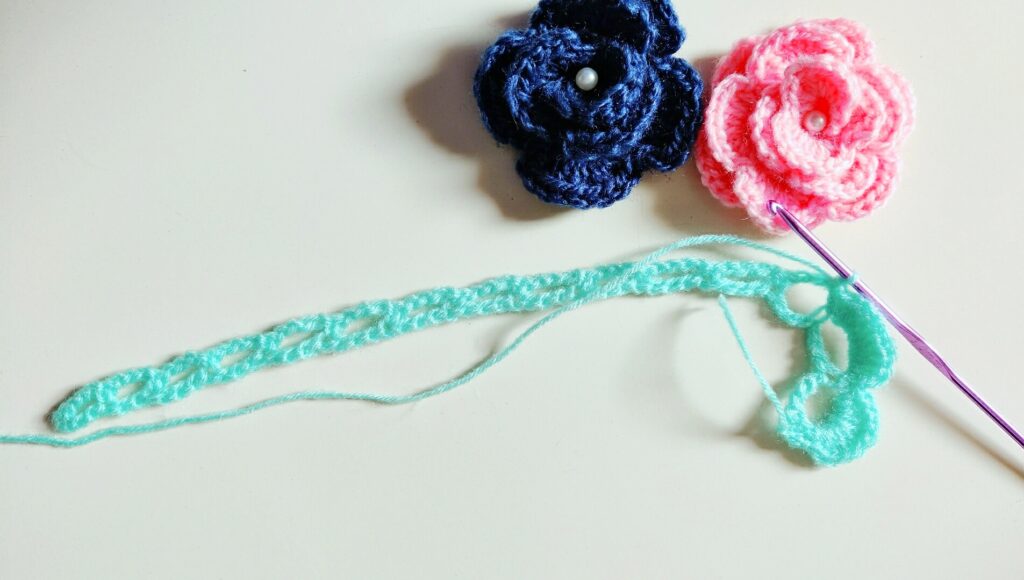
How to Crochet flower

Hi beautiful people! Today I’m so glad to be sharing this beautiful flower pattern for free. Its super easy to make and looks very professional too. Ah! And the beads add just a lil bit more of cuteness to it.

I could literally use them to decorate many of my existing projects; like bags, hairbands, socks, purse etc. You can even make a garland out of it and decorate your curtains, door or windows.

The steps of constructing this is really simple. It consists of only 2 rows and  its worked in a long chain. The petals are made distinctly from one another by working double crochets into the ch space. Then its coiled up and wrapped around in anti-clockwise direction to form the flower. Then the base or the backside of the flower is secured by sewing it up and ta-da! That’s how simple and easy it is to crochet. Even beginners can crochet this beauty with ease.

Steps of construction:

With 3 mm crochet hook

Chain in the multiples of 4. For this, Ch 60+3 

R1: 1sc into the 2nd chain from the hook, (ch4, skp3, 1sc) x 15; 1sc in the last ch

R2: Ch1 turn, {1sc, 8dc, 1sc into the ch4 space from previous row (1 petal) x 15}; 1sc in the last st. Leave a long tail and cut off the yarn.

Folding the flower:

With the side of the starting chain on left hand, face the petals towards you and the base away from you. Now with the base pointing downwards fold the first petal in half and slowly wrap the second petal around it in anti clockwise direction while your fingers hold it in place. Gradually keep wrapping the petals in an anti clockwise direction. If you make more chains, the flower would be bigger.

securing the base: With the long tail that was left behind, sew the base securely by passing the needle to the front, pick up a small stitch, then pass it to the back of the flower. You can watch the YouTube tutorial on my channel for visual help.

Beads: Pass the remaining yarn to the front near the center. Switch to a smaller needle which can pass through the bead hole. Pass the beads through the needle and secure the bead in the center by passing the very same thread to the back and knotting it off multiple times. Now you can cut the yarn and hide all the extra tails. 

This is a very simple technique and the flower turns out beautifully. You can use this flower piece to go with hair accessories like clips, headband, hand bags, slippers etc. Which would you use this flower for?

I’ve made a step by step tutorial on how to crochet this beautiful piece on my YouTube channel. Its a very basic and beginner friendly tutorial . So do check out the video to learn this very easy and simple technique. Also I would really appreciate it if you would subscribe to my channel. It would help me so much. If you have already done so, I’m really grateful to you for helping me grow. Thank you for reading this post.

Here is the video. I hope you enjoy it!

Also I’m available to answer any question related to one of the patterns I share here. So feel free to ask away in the comment section. 

Also please tag me on my social media pages so I can see your works too. 

Have a great week ahead. And wish you Happy Mothers’ Day! Stay blessed.

 Copyright © 2021 Lu’s Handicrafts     

This design, the written pattern and images are a copyright of Lu’s Handicrafts and may not be copied or reproduced in any way whether on paper or electronically.  You have permission to sell the finished products made from this pattern, but please leave a link to my website, www.lushandicrafts.com, in your product listing specifying that Kinjinlu Khumba is the designer of this pattern. Thank you for supporting me.


If you have any trouble with this pattern, find errors or want to give feedback, please feel free to contact me at lushandicrafts@gmail.com. Also a visual tutorial is available on my YouTube channel, Lu’s Handicrafts, if you need further assistance.

4 thoughts on “How to Crochet flower”

  1. Thanks so much for the inspiration and the easy to follow pattern I am starting to make these to sell at a craft fair to make money for a local senior citizens club, will send you photos when I have made them and will definitely display-your website address and specify that the pattern is designed by Kinjinlu Khumba.

    Stay safe and well x

Leave a Comment

Your email address will not be published. Required fields are marked *