Crochet Furry Slippers

Hi! You may have found this site through my YouTube video description box, search or direct browsing of my website. However you may have found this post, we’re going to have a beautiful time together for the next few minutes or hours getting crafty.. Ok, so lets get on with the pattern, ‘cos that’s what you’re here for, right?

Ok, first of all, I want to talk about the yarns that we’ll be using for this furry comforts. Its a beautiful, soft, furry, fuzzy yarn which could be about the size of a 6ply yarn. I’m not really sure. The furry texture of the yarn is the butter of this whole project, making the pattern much more fun, enjoyable and likeable.

If you want to use other types of yarn, you could go for a 6ply or not so chunky yarn which are soft and little bit furry in nature. Other yarns such as chunky, super chunky, or worsted weight might not give the same results as that of the furry yarns. The pattern simply won’t work in the same smoothness as this feathery wool. You could try and experiment it too if you’re the curious type. I’ve got a lot of designs in my head that I need to try out, so I won’t be experimenting it further with other type of yarns.

Materials:
1. You’ll need a sole to begin with. Soles are widely available on the market, but you can also use the sole of flip flops.
2.  Feather wool. Its not exactly the same, but you can always try this one out. 

3. 1.50 mm crochet hook to pick up the initial stitches and 3.5 mm hook for the body 
4. Scissors to cut yarns
5. Needle to sew in the ends

Abbreviations ( US terminology):
1. sc – single crochet
2. slp st – slip stitch
3. ch – chain

4. R – Row

Determining the starting point of the base:
This pattern begins from the toe portion.
1. Divide the toe section to 2 equal parts.
2. Take 2 equidistant points on both the sides from the middle, in such a way that the first initial stitches i.e Row1, would be evenly distributed within those two points.
3. With 1.5 mm crochet hook begin the foundation sc st from the point on the right. For a left handed person, they can start from the left point.

Note:
1. Put sc around the slipper, which acts as the foundation stitches and also a beautiful border. The number of stitch is not fixed. Put 2-3 sc into each of the base stitch; even going to 4sc if the stitch gap is long. This is the same for all the slipper sizes.
2. Because of the furry nature of the yarns, you’ll not be able to see the stitches. So you’re going in almost blind. Therefore you have to rely on your muscle memory to feel the next stitch. But you don’t have to worry too much about it. Just adjust the number of stitches required, by distributing the stitches evenly throughout for the particular row and it’ll be fine.
3. Slp st to the border or foundation st to complete a row. Slp st to the next foundation st to start a new row. ch1 to to begin the row (does not count as 1sc) and follow the st counts as provided in the pattern for the ongoing row. This will be done for every row till the last row. i.e slp st to the base to complete a row; slp st, ch1 to the next st of the base to begin a new row.
4. The stitches taken along the sides of the slipper should be equal through every row. However, the outer side of the slipper is allowed to be slightly longer, maybe just by a st.

Pattern:
Here are the pattern for different sizes. Find your preferred size and let’s begin.

size 5 (hook 3.5mm)

R1: 8sc

R2- 1sc, inc, 4sc, inc, 1sc.

R3&4 – 10sc. 

R5- 1sc, inc, 6sc, inc, 1sc. 

R6&7- 12 sc. 

R8- 1sc, inc, 8sc, inc, 1sc. 

R9&10- 14 sc

R11- 1sc, inc, 10sc, inc, 1sc.

R12&13 – 16 sc

R14- 1sc, inc, 12sc, inc, 1sc 

R15&16 – 18sc. 

size 6 (hook 3.5mm)

R1: 9sc

R2- 1sc, inc, 5sc, inc, 1sc.

R3&4 – 11sc. 

R5- 1sc, inc, 7sc, inc, 1sc. 

R6&7- 13 sc. 

R8- 1sc, inc, 9sc, inc, 1sc. 

R9&10- 15 sc

R11- 1sc, inc, 11sc, inc, 1sc.

R12&13 – 17 sc

R14- 1sc, inc, 13sc, inc, 1sc 

R15-17 – 19sc. 

size 7  (hook 3.5mm)

R1: 10sc

R2- 1sc, inc, 6sc, inc, 1sc.

R3&4 – 12sc. 

R5- 1sc, inc, 8sc, inc, 1sc. 

R6&7- 14 sc. 

R8- 1sc, inc, 10sc, inc, 1sc. 

R9&10- 1 sc 16

R11- 1sc, inc, 12sc, inc, 1sc.

R12&13 – 18 sc

R14- 1sc, inc, 14sc, inc, 1sc 

R15&16 – 20sc. 

R17- 1sc, inc, 16sc, inc, 1sc

R18&19 – 22sc

size 8  (hook 3.5mm)

R1: 11sc

R2- 1sc, inc, 7sc, inc, 1sc.

R3&4 – 13sc. 

R5- 1sc, inc, 9sc, inc, 1sc. 

R6&7- 15 sc. 

R8- 1sc, inc, 11sc, inc, 1sc. 

R9&10- 17 sc

R11- 1sc, inc, 13sc, inc, 1sc.

R12&13 – 19 sc

R14- 1sc, inc, 15sc, inc, 1sc 

R15&16 – 21sc. 

R17- 1sc, inc, 17sc, inc, 1sc

R18-20 – 23sc

size 9  (hook 3.5mm)

R1: 12sc

R2- 1sc, inc, 8sc, inc, 1sc.

R3&4 – 14sc. 

R5- 1sc, inc, 10sc, inc, 1sc. 

R6&7- 16 sc. 

R8- 1sc, inc, 12sc, inc, 1sc. 

R9&10- 18 sc

R11- 1sc, inc, 14sc, inc, 1sc.

R12&13 – 20 sc

R14- 1sc, inc, 16sc, inc, 1sc 

R15&16 – 22sc. 

R17- 1sc, inc, 18sc, inc, 1sc

R18&19 – 24sc

R20 – 1sc, inc, 20sc, inc, 1sc

R21 – 26sc
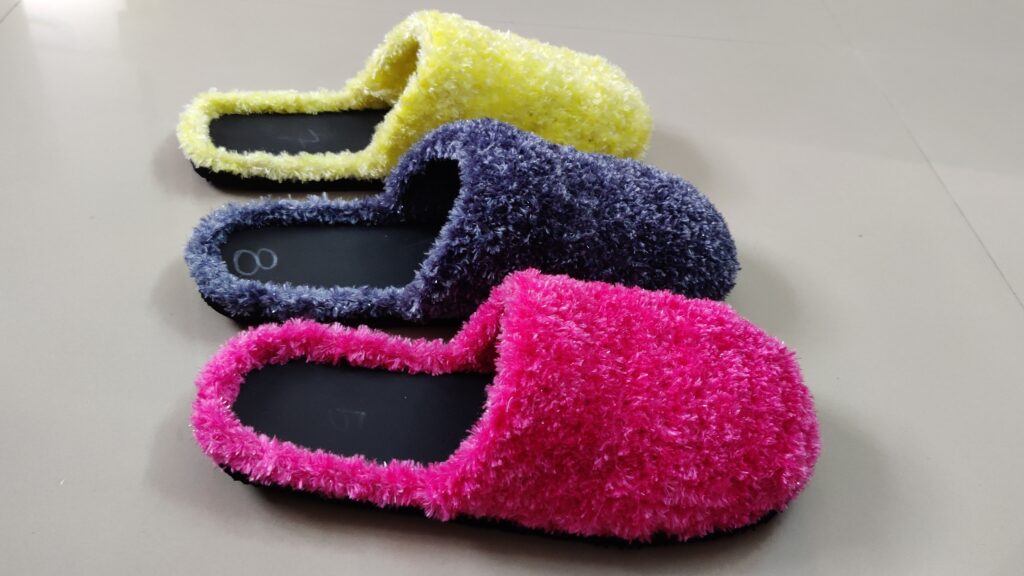
slp st to the foundation st, ch1 to secure and cut the yarn off. Hide the remaining tail and that’s it.

I would love to hear your thoughts on this slipper pattern. Please do leave a comment.

You can watch the YouTube tutorial if you need visual instructions.  So have fun and enjoy the process. Take care!

Leave a Comment

Your email address will not be published. Required fields are marked *