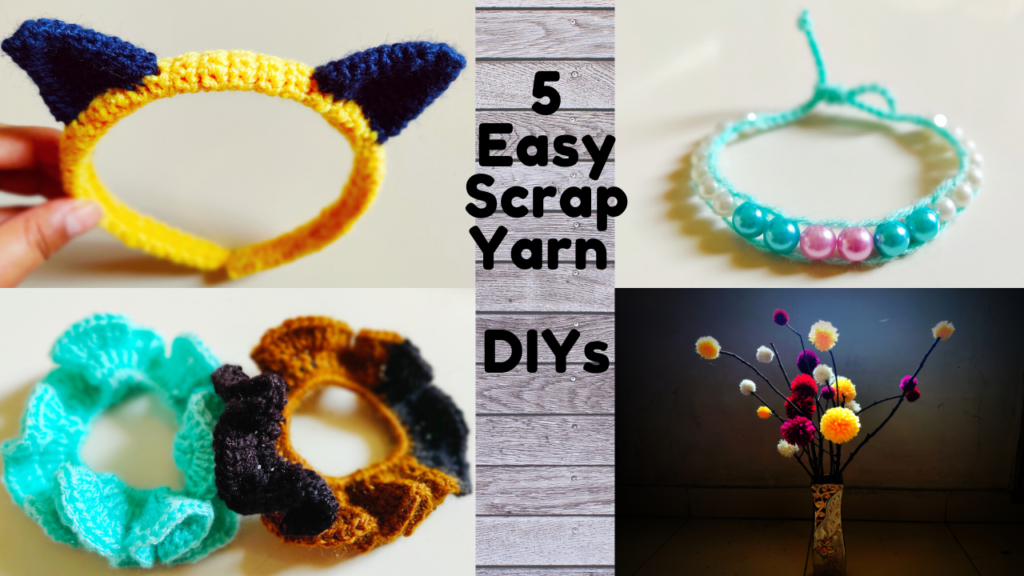
5 Easy DIY Ideas with scrap yarns

Hey creative knitters and crocheters! I hope this post finds you in a good time wherever you may be. Well today’s post is all about putting to a good use of our leftover and scrap yarns. 

If you’ve been working with yarns even for a short while, I’m sure you have leftovers which are not sufficient for the next project and too good to be thrown away either. I used to collect them thinking I’d use them with some other colour in my next project. Sometimes I do use them up but even then it’ll be left in a small quantity. However, most of them end up in the collection box. You can’t exactly say how many yards or meters you need while working on a project even if measurements are given in the pattern, and more if you’re designing by yourself, cos somethings needed to be fixed every now and then. 

Now, I’ve been storing them for quite some time and thought its time to clear out the box. So I’ve come up with some ideas to put them to good use. Of course there are numerous ideas but today I’m sharing 5 of them. I hope you enjoy these ideas. Do share your thoughts with me and also suggest more ideas, let’s work together on it. Okay then, have fun!

1) Crochet scrunchies

Scrunchies are so loveable and beautiful. Also they’re quite in fashion these days. So why not make one for yourself. I’m sure this is not your first time hearing about how to crochet scrunchie, but if you’re hearing it for the first time I’m glad. Because you’ll not be disappointed. 

Generally I’ve seen people using velvet or bulky yarn to crochet and in 1 colour, but I want to do it with a regular yarn and whats even better is that with leftover yarns, you unlimited number of combos. So here it is..

Designed by Kinjinlu Khumba


Level: Beginners  


#KK-Cr-Srunchie-05


This includes an affiliate link and if you happen to make a purchase I get a small commission, at no extra cost to you.

And it would be such an encouragement to maintain and keep running this website and keep updating new patterns. Thank you very much. 🙂 Click on the images for more details

Materials:

Hook: I use 4mm hook, but you can use any hook 

Yarn: Worsted weight yarn, 2 colours.

Elastic rubber band

Steps of construction:

It is a very simple project with only 3 rows using sc and dc.

R1:  With colour A, Sc around the elastic band, covering the elastic properly. slp st and join the round

R2: With colour A, 1 dc into every stitch upto about a quarter of the round, change to colour B and dc for another quarter. Repeat one more time. The colour should come out as A, B,A,B.  Slp st and join the round.

R3: With colour A, ch3, and put 3dc into 1 st; all the way till the first quarter. Repeat the same by matching the colour repeat from the previous row. Slp st to the top of ch3 of the beginning ch. Ch1 to secure and cut off the yarn. Hide the extra tails. And that’s it.

Note: The more dc you put into 1 st, the bigger will be the curls. 
 

I love how the colour combo of this scrunchie turned out.  It was completely random and just selected from the sea of colours in the collection box. I’m going to test out more colour combo and see how they look. Anyway, so thats’s how you crochet this easy scrunchie with your leftover yarns. 

Let me know how would you combine your colours if you decide to try this way.

2) Hair clip from flower

Hair accessories are a great gift ideas. Well now use your scrap yarns to create a beautiful piece.

Materials:

1)Hair clip

2) Instant glue (Hot glue gun) or any glue that’ll stick

3) Crochet flower

It is made just by sticking your flower piece to a clip with glue.

CROCHET FLOWER: The written pattern for this beautiful and easy flower is already published. You can check out the post here. 

Or you can watch the visual tutorial here

3) Pom Pom Flower

This includes an affiliate link and if you happen to make a purchase I get a small commission, at no extra cost to you.

Pom-poms are great for a lot of things. And for today’s DIY, its gonna turn into a flower for us.

Materials:

1) Pom Pom, 3 sizes. In many colours

2) Twigs

3) Glue

I believe everyone knows how to make a pom-pom. But if you need a reference, here’s a quick video to help you. 

Now attach the pom-poms to the twigs with glue. Arranging the sizes and colours as you go on to glue one by one.

If you want, you can also put some artificial leaves. But personally, I like it without the leaves as this version makes it look classy. Also it resembles hope in trying times, just like now. A flower in dry season. 

Its also a great decor and sure brightens the room. Try them and see it for yourself. I had fun making this because it is so simple and easy, and very pretty. Just make sure you choose matching and bright colours. 

4) Crochet Beaded Bracelet

Beads are beautiful and mesmerising which is why it is one of the best accessories for the ladies. Generally people make bracelets with other materials and not wool. Even the weaving method is different. They use needle of various types and stuffs I’m not so familiar with. Well today, lets do it a little differently and try making a beaded bracelet with the help of crochet hook and yarn. Hoping to achieve something with crochet technique in a unique way. 

Materials:

1)Beads of 1 or more sizes and colours

2) Yarn of your choice

3) A small crochet hook that can pass through the smallest beads. 

I use 0.75 mm hook


Steps of construction:

1) Make a chain of about 10 cm long

2) Insert the hook into the bead, yarn over, pull it through the bead and through the loop on the hook.

3) Pull up a loop, insert the hook through the 2nd bead and repeat the same till you achieve your desired length. 

Note: Try not to pull too tight or leave it too loose, while maintaining both the edges.

4) Ch 1 over the last bead and make a shorter chain of about 5 cm to 7 cm

8) Following the image as guide, make an adjustable loop so that the bracelet is flexible while putting on and off.

Hide all extra tails, and that is it.

5) Kitty Hairband

And finally for our last scrap yarn DIY idea, we will crochet a kitty hairband. I always fancied having a cute hairband as a kid but with no much luck. Well then I learned crochet, and I thought I could make one for myself. You can make it for your daughters. Also a great item to be gifted especially when its handmade.. Ooh! The feeling you get when you received a handmade gift. That’s another kind of bliss. Okay, let’s get on with it already. 

I have some yarns which I love. Check out the images below. This includes an affiliate link and if you happen to make a purchase I get a small commission, at no extra cost to you.

And it would be such an encouragement to maintain and keep running this website and keep updating new patterns. Thank you very much. 🙂
Click on the images for more details

Materials:

1) Old hairband   2) Yarns 

3) 3 mm hook  4) Needle  5) Scissors 

Steps of construction:

1) Ch 7 or the width required to wrap around your hairband

2) Just sc all across and back, till it is the length of your hairband

3) Sew it up all all across the length with a simple wip stitch. Close up the 2 ends  too

4) Now, adjust the position of the kitty ears on the hairband and pin it down in place so it doesn’t move. 

5) Sew up the eras, both from front and back; giving a somewhat curve shape. Hide all extra tails

CROCHET EARS:

R1: 8 sc into magic ring

R2: (3sc, increase) x 2 times

R3:(4sc, increase) x 2 Times

R4: (5sc, inc) x 2 times

R5: (6sc, inc) x 2 times

R6: (7sc, inc) x 2 times

R7: (8sc, inc) x 2 times

R8: ( 9sc, inc) x 2 times

R9: (10sc, inc) x 2 Times

Leave a long tail to sew it to the hairband, cut off yarn.


And that’s how you put a good use of your scrap yarns to make a fancy hairband. It doesn’t use much yarn and makes an old hairband look new, fancy and unique. Here’s some more photos of the completed project.

So these are the 5 ideas you could do wonders with all those tiny  yarn balls. Which is your favourite? And what all colours would look great or you would rather use? Do give me your opinions and do share your work with me by tagging me on my social media platforms. @lushandicrafts on Instagram and Lu’s Handicrafts on Facebook page. 

If your interests are similar to that of mine, please follow me on Instagram and Facebook. 


I hope this little post gave you some joy and satisfaction amidst this hard and trying times. Also I hope you have learned something new today. One thing we can do is stay optimistic, keep learning in whatever way we can and take care of ourselves. I wish you all the best in this time of crisis. 

Stay safe, take care and God bless you. 

Thank you.


 Copyright © 2021 Lu’s Handicrafts     

This design, the written pattern and images are a copyright of Lu’s Handicrafts and may not be copied or reproduced in any way whether on paper or electronically.  You have permission to sell the finished products made from this pattern, but please leave a link to my website, www.lushandicrafts.com, in your product listing specifying that Kinjinlu Khumba is the designer of this pattern. Thank you for supporting me.


If you have any trouble with this pattern, find errors or want to give feedback, please feel free to contact me at lushandicrafts@gmail.com. Also a visual tutorial is available on my YouTube channel, Lu’s Handicrafts, if you need further assistance.

Leave a Comment

Your email address will not be published. Required fields are marked *